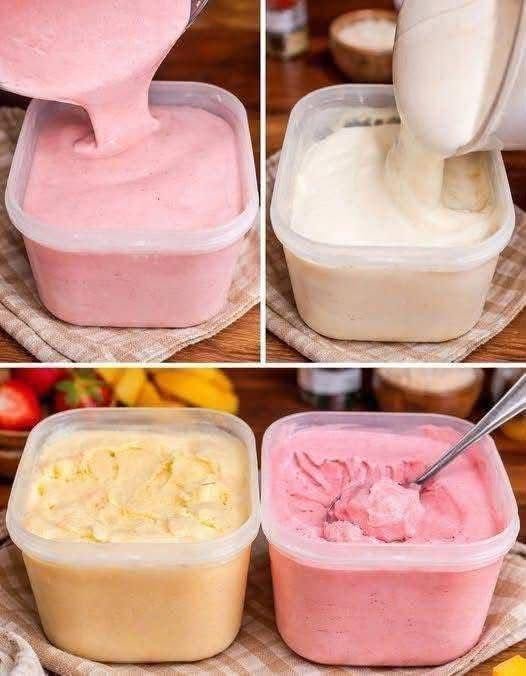
Homemade ice cream does not have to require an ice cream machine, complicated custard, or hours of preparation. This simple no-churn method creates a smooth, creamy dessert using just a couple of basic ingredients and your freezer.
The viral post describes this ice cream as “zero carbs” and suggests that you can eat as much as you like. However, traditional versions made with sweetened condensed milk are not zero-carb, and no ice cream should be considered a food that can simply be eaten without regard to portion size. The good news is that this homemade version is still incredibly easy and delicious.
Ingredients
2 cups heavy whipping cream, very cold
1 can (14 ounces) sweetened condensed milk
1 teaspoon vanilla extract, optional
For strawberry flavor: 1/2 to 1 cup strawberry puree or finely chopped strawberries
For other flavors: use your favorite fruit puree, crushed cookies, chocolate, or other mix-ins
Instructions
Place the cold heavy whipping cream in a large mixing bowl. Using a hand mixer or stand mixer, whip the cream until stiff peaks form. The cream should be thick and hold its shape when the beaters are lifted.
In a separate bowl, combine the sweetened condensed milk with the vanilla extract if using. For a flavored version, you can also mix in fruit puree or another flavoring at this stage.
Add a small portion of the whipped cream to the condensed milk mixture and gently stir to lighten it. Then carefully fold the remaining whipped cream into the mixture in batches. Fold gently rather than vigorously mixing, because keeping the air in the whipped cream helps create a light and creamy texture. (Food Network)
Transfer the mixture to a freezer-safe container and smooth the surface. Cover the container tightly. Pressing parchment or wax paper against the surface can also help reduce the formation of ice crystals. (Kitchn)
Place the container in the freezer for at least 6 hours, or preferably overnight, until the ice cream is firm and scoopable. No-churn ice cream recipes commonly use this freezing method instead of an ice cream machine. (Food Network)
When ready to serve, let the container sit at room temperature for a few minutes if the ice cream is very firm. Scoop into bowls or cones and add your favorite toppings.
Easy Flavor Ideas
The basic vanilla mixture is only the beginning. You can create strawberry ice cream by folding in strawberry puree, or make a tropical version with mango. Crushed cookies, chocolate chips, chopped nuts, caramel sauce, or chocolate syrup can also be folded into the mixture before freezing.
For the colorful versions shown in the photo, fruit puree or fruit-flavored additions can give the ice cream both its flavor and natural-looking color.
Tips for Creamy Homemade Ice Cream
Always start with very cold heavy cream. Whip it until stiff peaks form, but avoid whipping for too long because the cream can become grainy and eventually turn into butter.
When combining the whipped cream and condensed milk, fold gently. Overmixing can remove some of the air that gives no-churn ice cream its soft, creamy texture.
Use a freezer-safe container with a tight-fitting lid and give the ice cream enough time to freeze completely. A typical no-churn recipe takes around 4 to 6 hours or longer depending on the container and freezer. (Food Network)
The Bottom Line
This homemade no-churn ice cream is an easy way to make a rich and creamy frozen dessert without an ice cream maker. With cold heavy cream and sweetened condensed milk as the base, you can customize it with fruit, chocolate, cookies, or other favorite flavors.
Just keep in mind that the traditional recipe is not zero-carb because sweetened condensed milk contains carbohydrates and added sugar. Enjoy it as a homemade dessert, in a portion that fits your eating plan, rather than relying on the viral claim that it can be eaten without limits.